Model Training and Optimization#
You can configure and retrain your trained models in the Models screen after entering your project. On the Models’ landing page, you will see all your active models.
Models’ Home Screen#
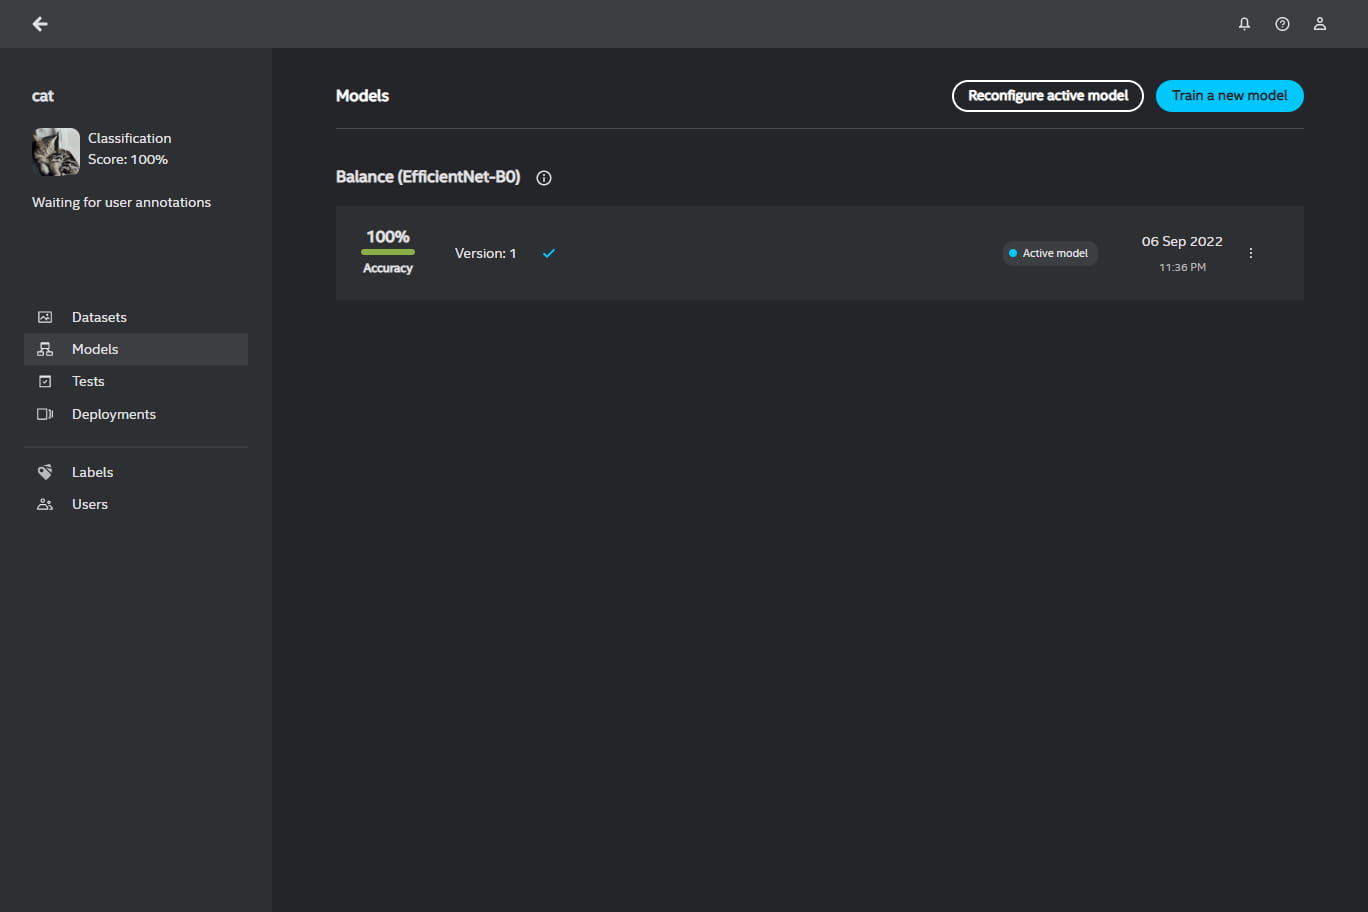
In the home screen of Models, you can reconfigure parameters for active model(s) by pressing Reconfigure and perform transfer learning (training a new model from the base model) by pressing Train a new model. Each mentioned button invokes a dialog box with the settings.
For anomaly projects, you will be presented with two accuracy scores:
Classification accuracy - this score pertains to accuracy on images i.e. it detects whether there is any anomaly in images
Localization accuracy - this score pertains to accuracy on objects i.e. it detects what regions in images contain anomalous objects
Reconfigure active model#
On the left hand side of the dialog box, you will find 2 options: Global and project-specific, whose name depends on a project type (e.g. Classification task, Detection task etc.). In both of these options, you will find a number of parameters you can tinker with. For instance:
Batch size - The number of training samples (e.g. annotated images) seen in each iteration of training. Increasing this value will reduce the computation time. However, a larger batch size has higher memory requirements.
Learning rate - The size of step at each iteration while reaching a minimum of a loss function. This parameter controls how fast the model adapts to the problem. Increasing this value may speed up training but may also lead to a suboptimal solution.
Maximum number of training epochs - The number of times an algorithm goes through the entire dataset. Increasing this value causes the results to be more robust but the training time becomes longer.
Image tiling#
Image tiling is available in detection and instance segmentation projects, where you can enable this feature in the configurable parameters accessible by clicking on Reconfigure active model.
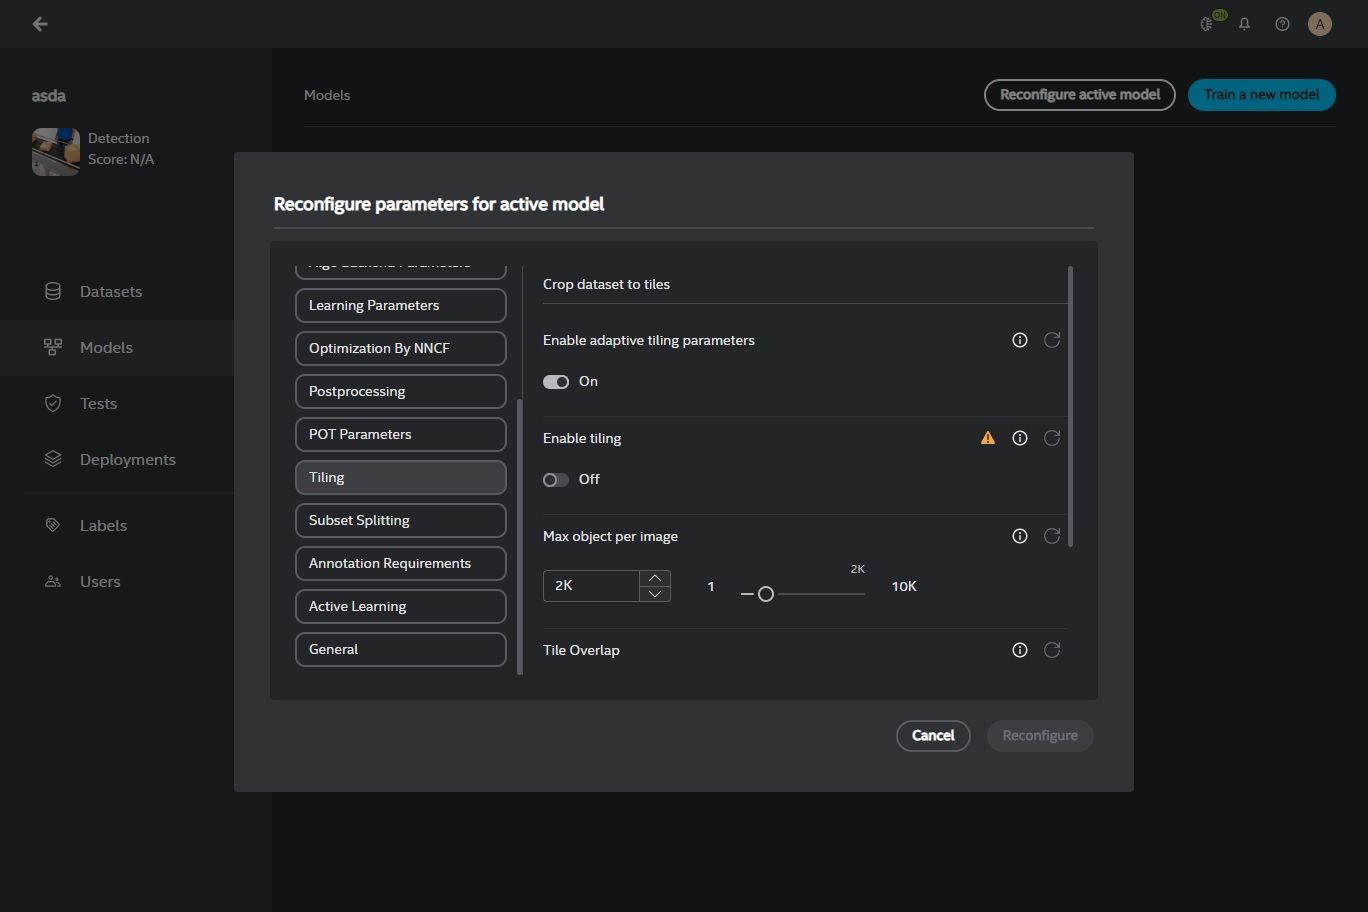
Image tiling is a technique used to divide a large digital image into multiple smaller images or so called tiles. Tiling is most effective when dealing with large-scale, high-resolution images, such as satellite imagery and aerial photographs, which often contain minuscule objects of interest.
Train a new model#
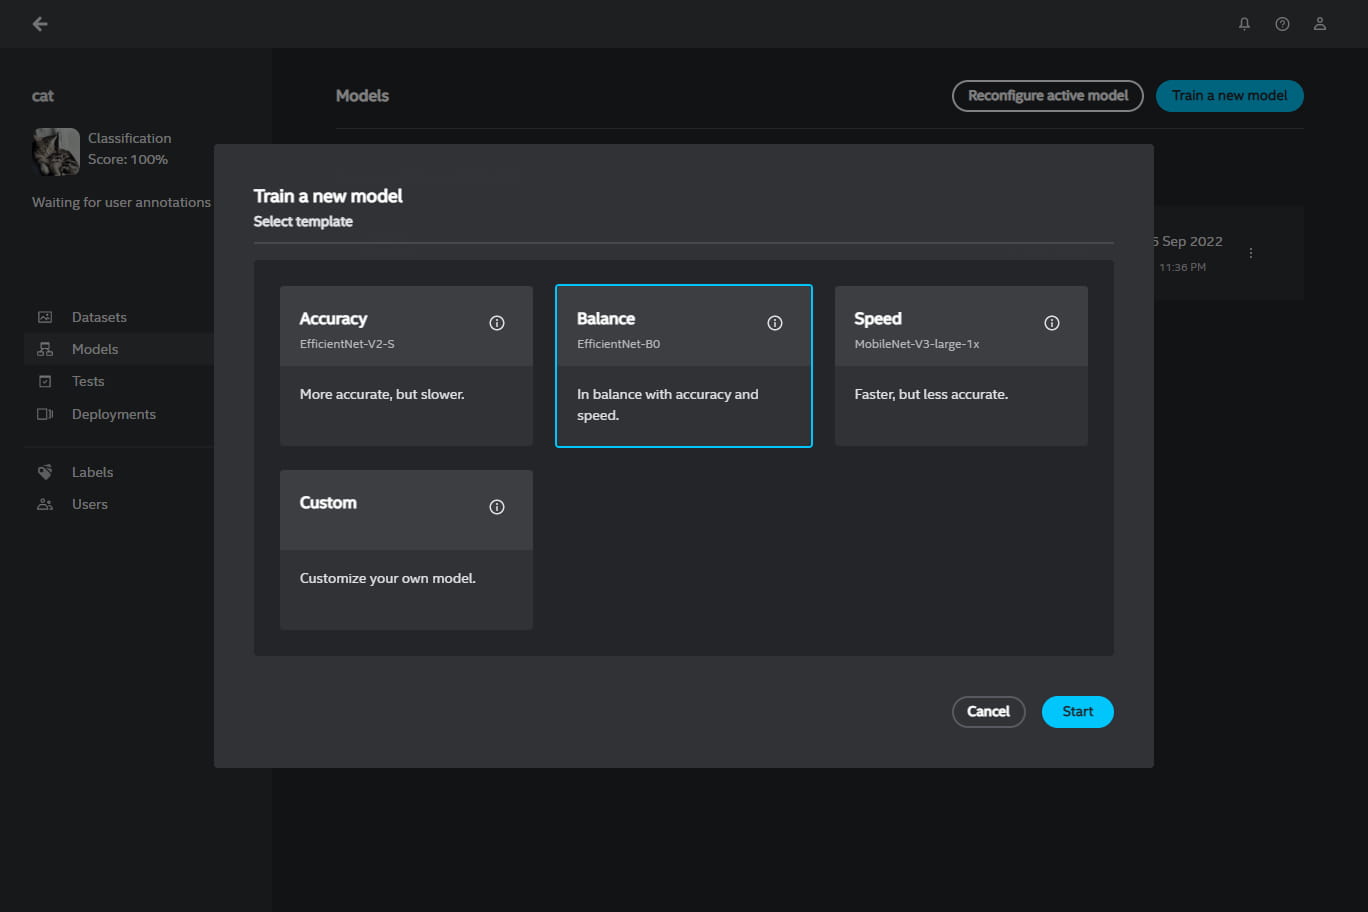
In this dialog box, you will see four model templates for creating a new model with the focus on accuracy, speed, balance, or custom configuration:
Accuracy option - produces a more accurate, but slower and larger model
Balance option - produces a model in balance with accuracy and speed
Speed option - produces a faster and smaller, but less accurate model
Custom option - produces a customized model with a selected neural network architecture and hyperparameters
The custom option will take you to a wizard that will guide you during the configuration process. You will be prompted to select one of selectable neural network architectures.
Once you select the architecture, you will be taken to the second step where you can customize hyperparameters for the new model. You can do it manually or automatically by the system with HPO (Hyper Parameter Optimization) prior to starting a training round. HPO is available only for some neural network architectures.
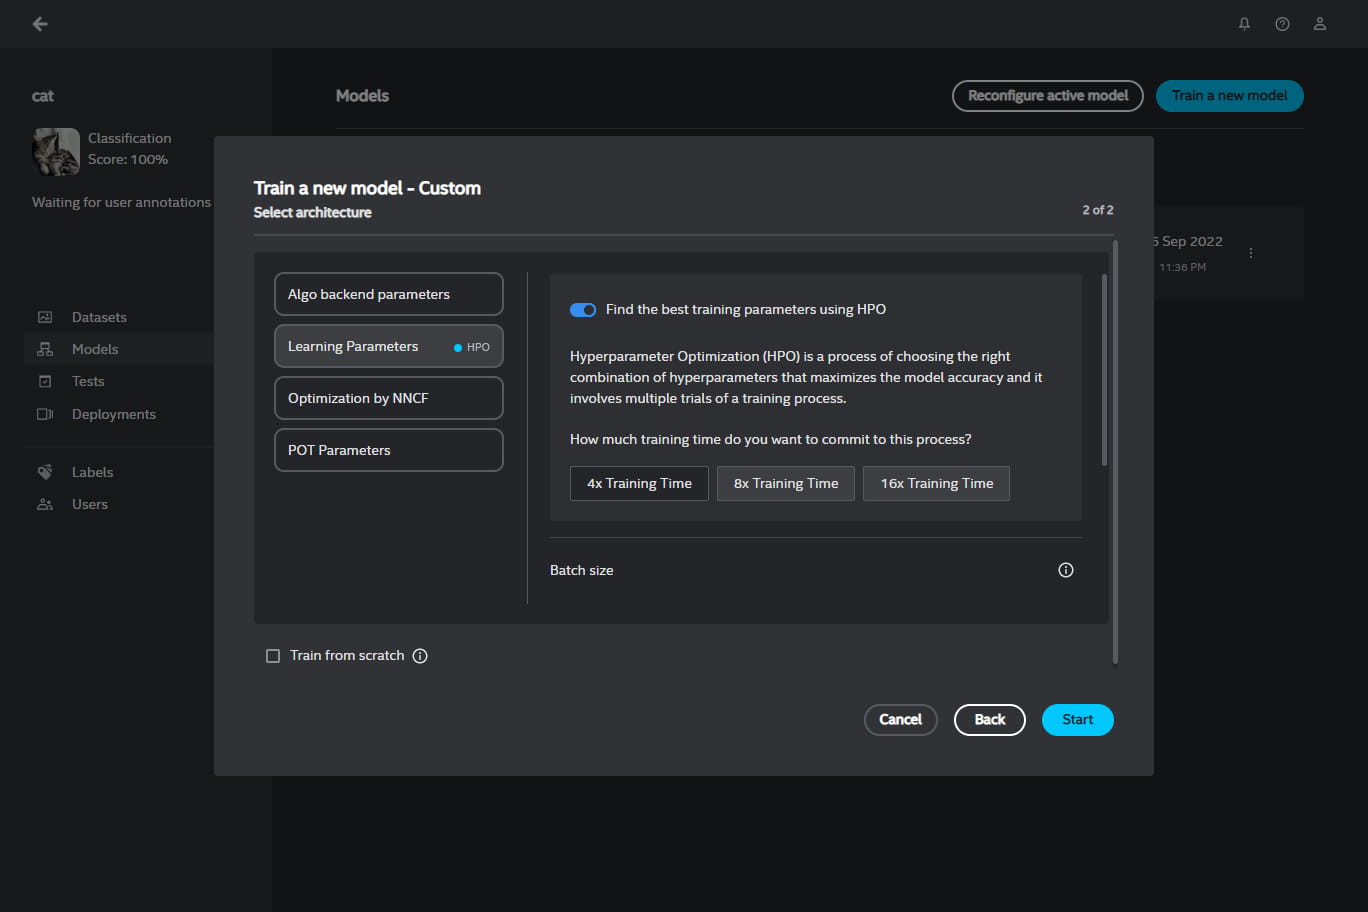
HPO trains a few times on a reduced subset of the training set, each time using a different combination of the hyperparameters to optimize. The combination of parameters that results in the best performance is then saved and used in the full training run. HPO supports two parameters: the batch size and the learning rate.
You can also customize the new model by clicking on the Train from scratch box, which ignores the training history and retrains the model from the beginning.
Note
If you would like to train a custom model with exported data from the Intel® Geti™ platform, see this example leveraging PyTorch Lightning.
View model’s version history#
You can also see the versions of your active model by clicking on the show more icon ![]() to see the accuracy and the creation date of each model version.
to see the accuracy and the creation date of each model version.
Note
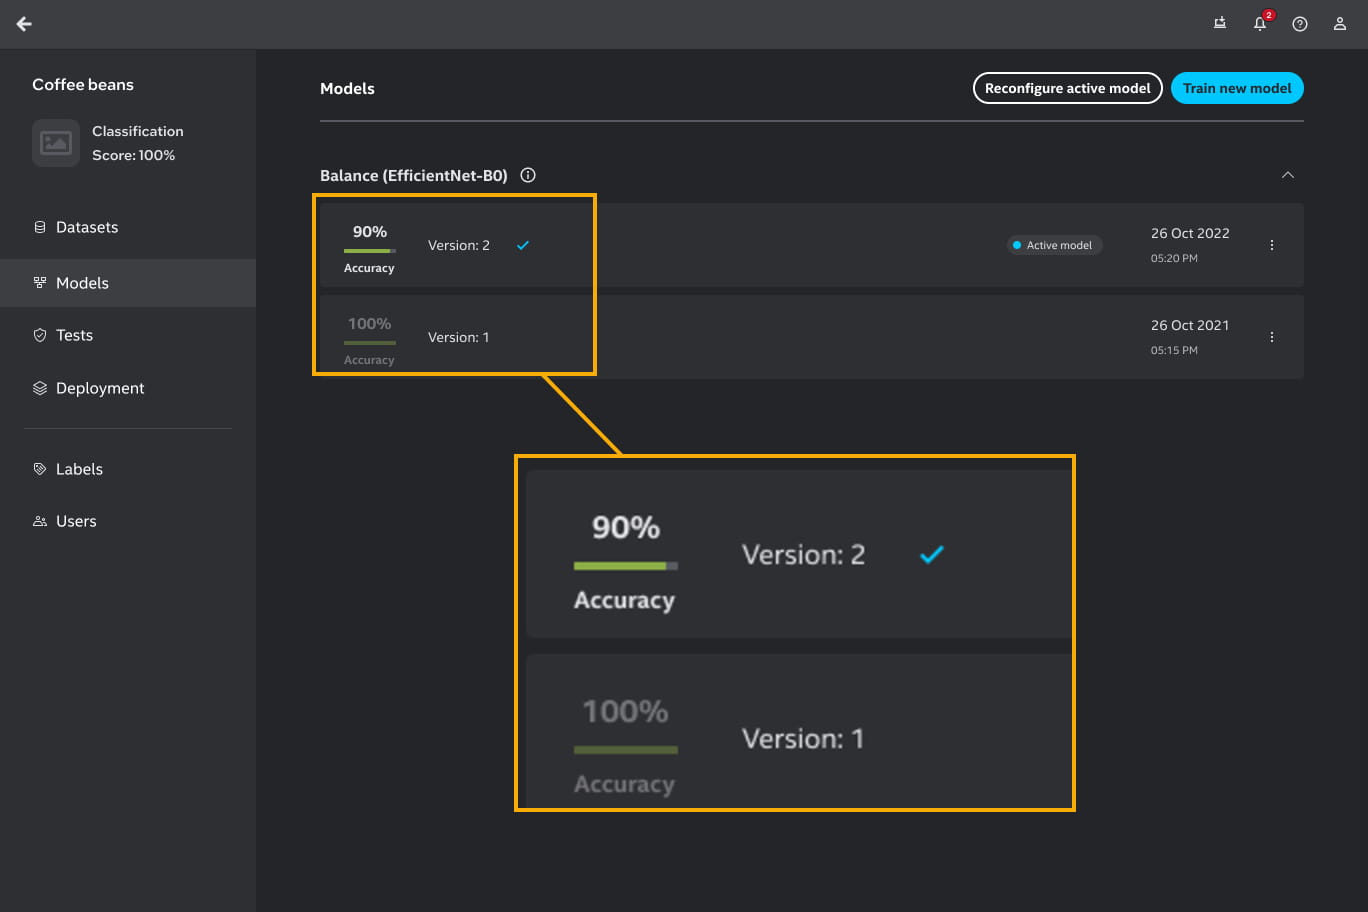
Sometimes, you may notice that the system accepts a model with a lower accuracy than the previous model version. You may think that the selected model with the lower accuracy will perform worse. That is not the case. When the next version of a model is made the platform computes the performance of the new version based on the current dataset and also computes the performance of the old model on that new dataset.
For instance:
Model 1 is trained on simple images and it shows performance of 100%.
After training, active learning suggested more complicated images to annotate.
Model 2 is trained on simple and more complicated images.
The system collects the performances of model 1 and model 2 on the more complicated dataset.
Let’s assume, model 2 yields 90% while model 1 yields 60%. The system will accept model 2 as the latest model.
The model screen will show the history of the models with their respective dataset. In this example, the screen will show that model 1 has 100% performance and model 2 has 90% performance. Rest assured that the latest model performs better based on the latest dataset.
Change active model#
If you have trained a couple of models with different architectures, you can change the active model between these architectures. When you change the active model, the model parameters configuration will be passed from a previously active model to a newly set active model.
If you have not trained any model yet, you can change the configuration that will produce the first model in the Models screen - click on Train model to do so. The Balance (SSD) model is set by default as active model before any training starts.
Models’ Details Screen#
You can view more options for each of your model by simply clicking on the model of your choice. You will see the details for the model version you selected but you can switch between versions any time by clicking on the show more icon ![]() in the Model breadcrumbs at the top of the screen.
in the Model breadcrumbs at the top of the screen.
Upon clicking on the model, you will land in the Optimized models tab from which you can select other tabs:
Model variants - where you can view all your models
Model metrics - where you can view the statistics for your model
Parameters - where you can view hyperparameters your model was trained with
Labels - where you can view labels your model contains
Model variants#
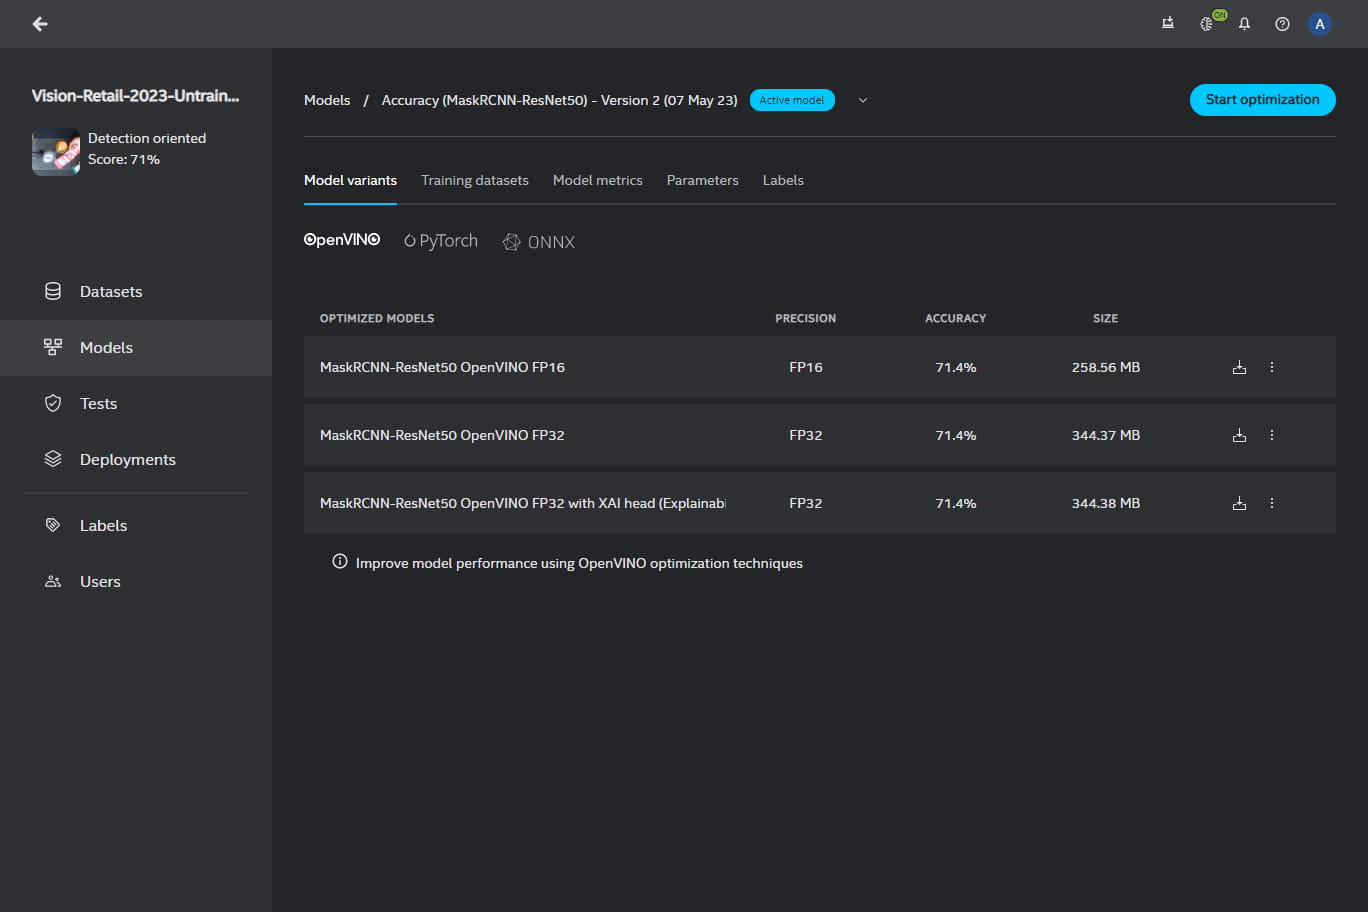
You will see your active model with the following information:
baseline model - the name of the model with which the Intel® Geti™ platform started training
precision - a computer number format that occupies space in computer memory
accuracy - the score of the model (measured in %) that indicates a ratio of correctly predicted observation to the total observations
size - the amount of storage capacity the model consumes
download button
 - allows you to export the trained model
Below your baseline model, you will see your optimized models. If you do not see any optimized model, it means you have not optimized any model yet. You can optimize a model by clicking on Start optimization.
Start optimization option#
When you click on Start optimization, you will be able to convert your model to OpenVINO. Additionally, you can set the optimization to include:
Training dataset#
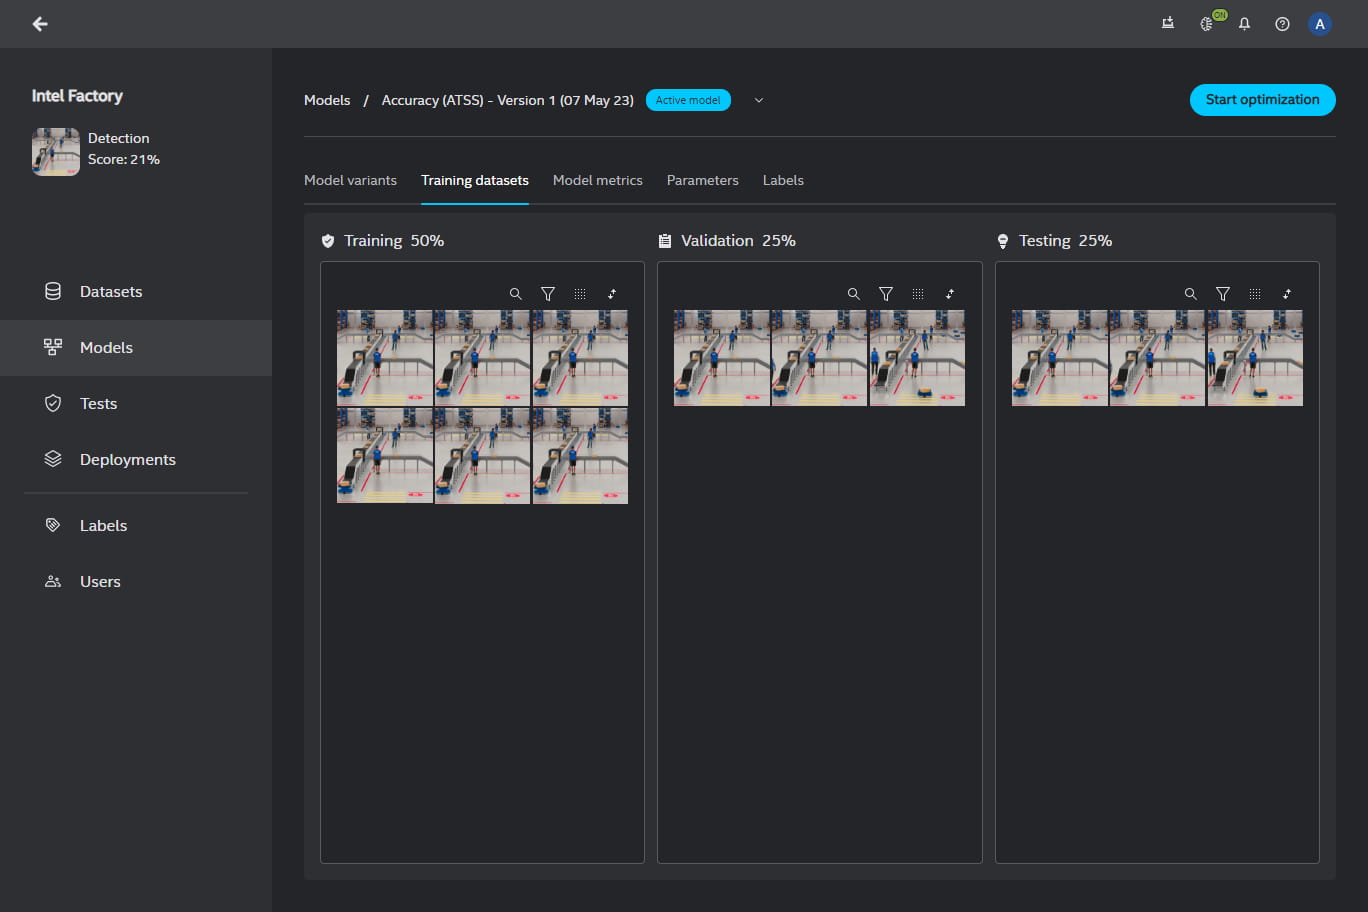
In the Training dataset tab, you can see which images or video frames are used as part of a given subset. You can see the file information by hovering over the thumbnails and view the images or frames by clicking on the thumbnails.
The training dataset is split into three parts (subsets):
Training subset - the system will train on these items
Validation subset - used during training on which performance and optimization is validated
Testing subset - this subset is used to validate performance after training
By default, the split between these subsets depends on the dataset size. If there are less than 10 images, the split is (1/3, 1/3, 1/3). If there are between 10 and 40 images, the split is (1/2, 1/4, 1/4). If there are over 40 images, the split is (8/10, 1/10, 1/10). Most of the measures in the UI state on which subset they are computed (validation or test subset). In general, the score on a validation subset is higher since that is used to optimize the model.
Important
After training a new model, the subset distribution remains unchanged even if manual modifications are made to the subset distribution in the configuration screen. To ensure that the modified distribution takes effect, it is necessary to adjust the distribution sets prior to training any model.
Model metrics#
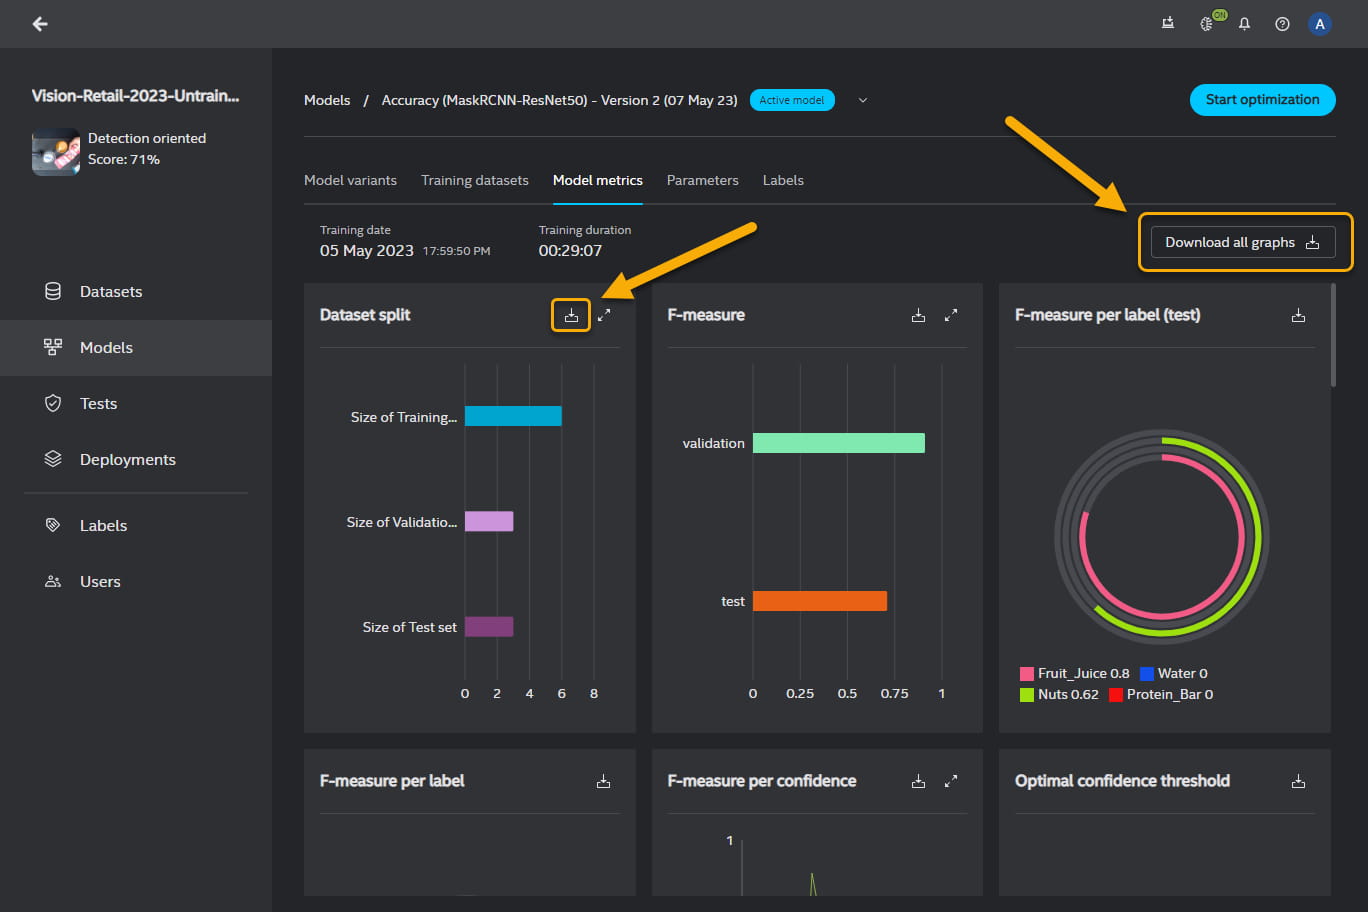
You can export all the metrics graphs in a PDF format or individually selected metrics graphs in a PDF or CSV format. To download all metrics graphs, click on Download all graphs in the top right-hand corner of the Model metrics panel. To download an individual graph, click on ![]() in the in the top right-hand corner of the graph box.
in the in the top right-hand corner of the graph box.
Configurable parameters#
You will find the same options as in Reconfigure in the home screen of Models with the exception of these parameters to be applied to one specific model you selected.